


5 giorni alla settimana dalle 8:30 alle 17:30

Why Do Commercial Range Hood Lights Keep Burning Out? Common Causes and Solutions
Commercial range hood lights can fail repeatedly because the replacement lamp is unsuitable, the fixture runs outside its temperature limits, electrical contacts are damaged, vibration affects the assembly, or moisture reaches electrical parts. With LED systems, the failed component may be the driver or connection rather than the light source itself.
The useful first step is to record when and where failure occurs. One fixture failing repeatedly suggests a local problem. Several lights failing together calls for investigation of shared power or controls. Neither pattern proves a cause, but both help a qualified technician choose the next check.
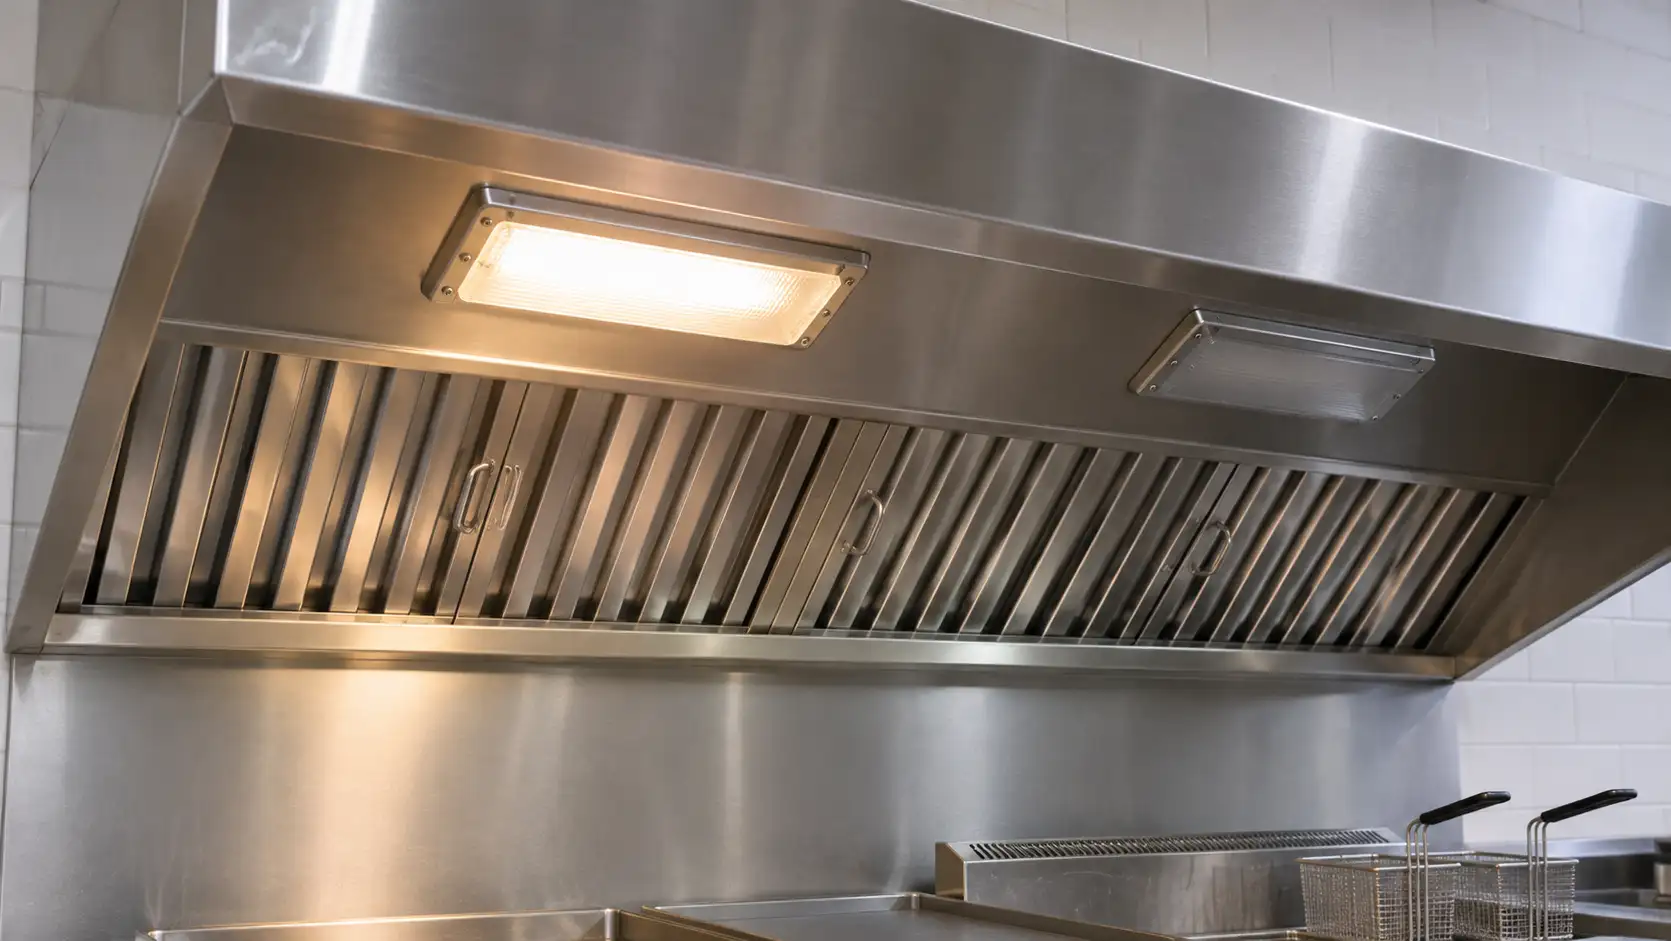
First confirm the correct replacement
A bulb that fits the socket may still be unsuitable for the hood. Match the approved lamp type, voltage, base, power limit, temperature suitability, and enclosure conditions. For an integrated LED fixture, also verify the driver, electrical connections, mounting, and dimensions.
Commerciale gamma luci cappuccio come in different formats, including enclosed lamps and LED panels. Their requirements are not interchangeable. An ordinary household LED bulb should not be selected solely because it uses less power or has the same screw base.
Read the hood label and the actual fixture instructions before ordering. If information is missing, obtain the model and serial number, photograph the existing assembly, and ask the equipment manufacturer for the approved replacement. Never apply another hood model’s maximum wattage to yours.
Before any inspection, isolate electrical power using the site’s approved procedure and allow hot surfaces to cool. Socket repairs, wiring work, driver checks, and electrical measurements belong to a qualified technician. Do not bend contacts or open live components as a troubleshooting shortcut.
Use the failure pattern to narrow the search
Keep the failed part until the cause is investigated. Record installation date, approximate operating hours, replacement part number, and whether the event followed cleaning, fan operation, or a busy cooking period. A short record is more useful than repeatedly buying a different bulb.
|
Observed pattern |
Possible area to investigate |
Useful evidence |
|
Same fixture fails repeatedly |
Local heat, socket, seal, or connection |
Fixture photos and replacement history |
|
Light fails after cleaning |
Water entry or cleaning damage |
Cleaning method and timing |
|
Flickering when the fan runs |
Vibration, connection, or supply issue |
Fan state and service observations |
|
LED goes dark when hot, then returns |
Thermal protection or another intermittent fault |
Timing and temperature observations |
|
Several lights fail together |
Shared circuit, control, or supply |
Circuit arrangement and event log |
These are investigation leads, not diagnoses. A return to normal operation does not establish that an intermittent electrical fault is safe.
Excessive heat and unsuitable LED replacements
Heat should be checked against the limits for the lamp, fixture, driver, and installation. An LED replacement can use less electricity while still being unsuitable for a hot enclosed hood location. Its electronics need conditions within the manufacturer’s stated limits.
Ask the technician to assess the installation during representative cooking operation. A cool kitchen before service may not reproduce the exposure above a working grill. Compare measurements with documented limits at the relevant location; avoid using one generic temperature threshold for every hood.
Check for altered covers, missing components, or an incorrectly positioned driver. Do not remove a protective globe or modify the enclosure to make an unsuitable lamp run cooler. That can introduce contamination and electrical risks while changing the approved assembly.
If a temperature-related problem is confirmed, correct the installation or select an approved compatible system. Replacing an overheating lamp with a higher-powered bulb adds another mismatch and should never be used to compensate for poor illumination.
Damaged sockets, loose connections, and vibration
Repeated incandescent failures can result from vibration or poor socket contact. A technician should inspect the holder and connections for damage, overheating, looseness, and suitability for continued service. Replacing the lamp cannot repair a deteriorated socket.
Fan-related vibration is worth investigating when failure or flickering follows fan operation. The fault may involve the fixture mounting, the fan assembly, or an electrical connection. A rough-service lamp may be specified for some incandescent installations, but it does not correct a mechanical defect or authorize a substitution in every hood.
Avoid overtightening a replacement bulb in an attempt to stop flickering. Excess force can damage the assembly. Follow the equipment instructions, replace defective parts, and address the vibration source through the appropriate service procedure.
For an LED panel, inspection extends beyond the visible light surface. A commercial hood LED panel is a different assembly from a screw-in bulb. Before substituting one, confirm the cutout, fixing method, supply, driver arrangement, and approved operating conditions. A matching outline is insufficient.
Moisture, grease, and cleaning damage
Water inside a light fitting requires investigation before the circuit is returned to service. Entry can involve damaged seals, the enclosure, connections above the fixture, or a leak elsewhere in the hood system. Simply drying the visible cover can leave the entry path unresolved.
Record whether failures follow washing or appear during ordinary operation. Share photographs of droplets, staining, cracked covers, or displaced seals with the technician. Do not assume water entered from below; inspection may need to include the area above the hood.
A waterproof marketing description does not establish resistance to every cleaning method. Confirm the documented ingress protection and permitted cleaning procedure for the exact assembly. Avoid directing pressure washing or chemical spray at electrical fittings unless the manufacturer explicitly permits that method.
Grease on a lens can also make a functioning lamp appear dim. Clean accessible surfaces only as instructed, with power isolated where required. If the light remains dim, establish whether contamination, a failing component, or a power issue is responsible before increasing wattage.
Supply, controls, and LED driver faults
When several fixtures flicker or fail together, a technician should review the shared circuit and controls. Relevant checks may include supply compatibility, connections, switching devices, and any dimmer or electronic controller. The precise tests depend on the circuit and equipment documentation.
Do not assume every event is a power surge. Likewise, do not install a different driver because its connector fits. LED systems require the correct electrical relationship between the light module and driver, including the specified output characteristics and ratings.
An integrated fixture may require complete replacement or a specified service component. Ask whether the driver is separately serviceable and whether replacement preserves the intended enclosure and installation. Reusing a damaged seal or unapproved connector can undermine an otherwise correct repair.
Keep failed components identified by their original position. If several apparently identical fittings have different replacement histories, a location-based log can reveal that distinction. Include changes to cooking equipment beneath the hood, cleaning practice, and operating hours in the service record. These observations help the technician reproduce the circumstances without relying on memory. They also make supplier discussions more specific: the question becomes whether a documented assembly suits a known installation, rather than whether a brighter or more expensive lamp might last longer. Retain the original labels whenever they remain readable.
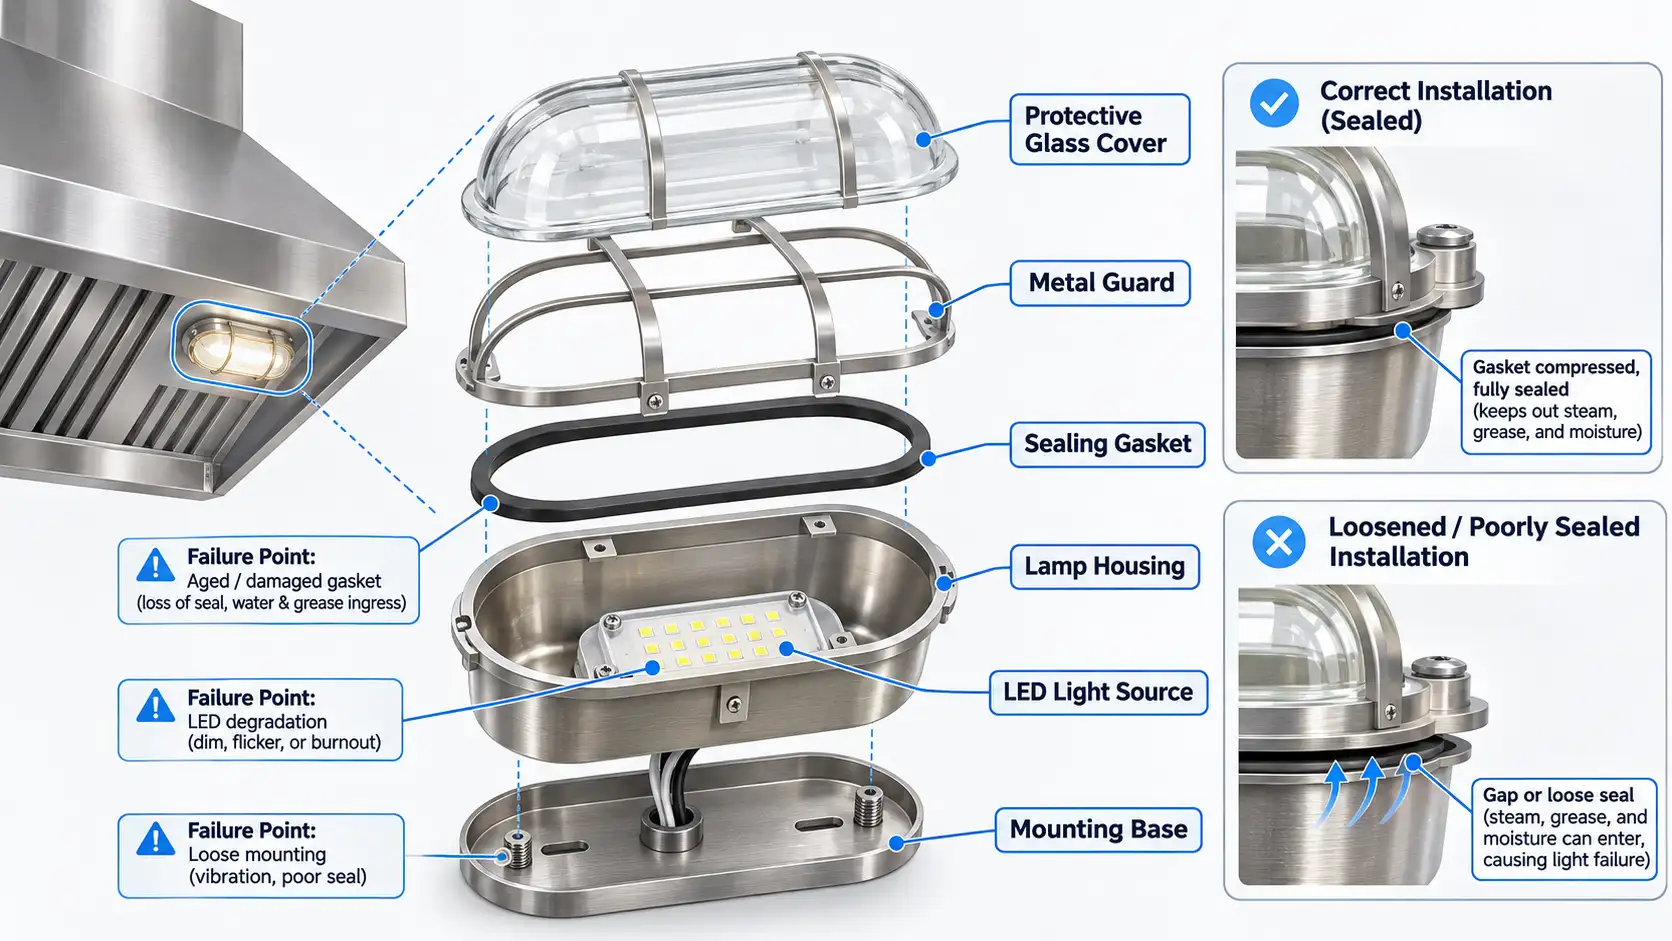
Verify the repair and prevent repeat failures
After repair, the technician should confirm safe operation using the manufacturer’s procedure. Include normal cooking and fan conditions where appropriate, then monitor the fixture over subsequent shifts. Record the component fitted, corrective work, date, and any limits or follow-up instructions.
For purchasing teams, keep a model-specific replacement list. Include fixture and lamp references, electrical ratings, mounting dimensions, seal requirements, and relevant approvals. Separate visually similar parts in stores so a hurried replacement does not restart the same failure cycle.
For OEM orders, approve an actual sample assembly and controlled drawing. Agree what supporting documentation is required for temperature exposure, electrical compatibility, cleaning, and the finished equipment. Do not infer a particular certification or service life from the product description.
To discuss replacement options with Simple, send the hood-light specifications and installation photos together with the failure pattern and quantity. A preliminary component review should lead to a documented fit check; the equipment manufacturer or qualified technician must approve the installation.
Domande frequenti
Can I put an ordinary LED bulb in a commercial hood?
Only if it meets the fixture and hood manufacturer’s requirements, including enclosure and temperature conditions. Base compatibility alone does not establish suitability.
Why does a new bulb fail in the same socket?
Investigate the socket, local operating conditions, connections, and replacement compatibility. Repeated failure at one location is a clue, not proof that the bulbs are defective.
Does flickering mean the bulb is burning out?
Not necessarily. A connection, driver, controller, or supply problem can produce similar symptoms. Have persistent flickering assessed rather than repeatedly changing lamps.
Should I use a higher wattage for brighter light?
Never exceed the approved limit. If illumination is inadequate, check cleanliness and correct operation, then seek an approved lighting solution.
What information should accompany a warranty inquiry?
Include part and equipment references, purchase and installation dates, failure timing, photographs, operating conditions, and relevant service records. Confirm the supplier’s actual warranty terms separately.
